Why Reinhard desaturates my blacks
I’m doing it wrong.
Now that TFU2 is almost out of the door, I’ve been catching up on this year’s GDC presentations. One that was of particular interest to me was John Hable’s Uncharted 2 HDR Lighting talk because I think we’re all in agreement about how awesome the game looks. That led me to checking out his blog and his discussions of various tone mapping operators.
I agree with him on most of his points and I really like the results of his operator, but I was a bit disappointed by the treatment of Erik Reinhard’s tone mapping operator.
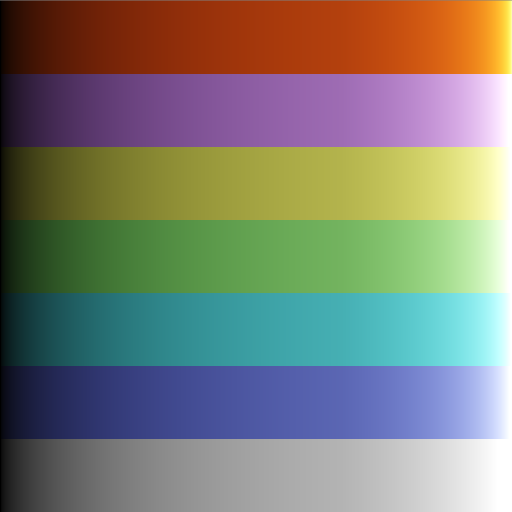
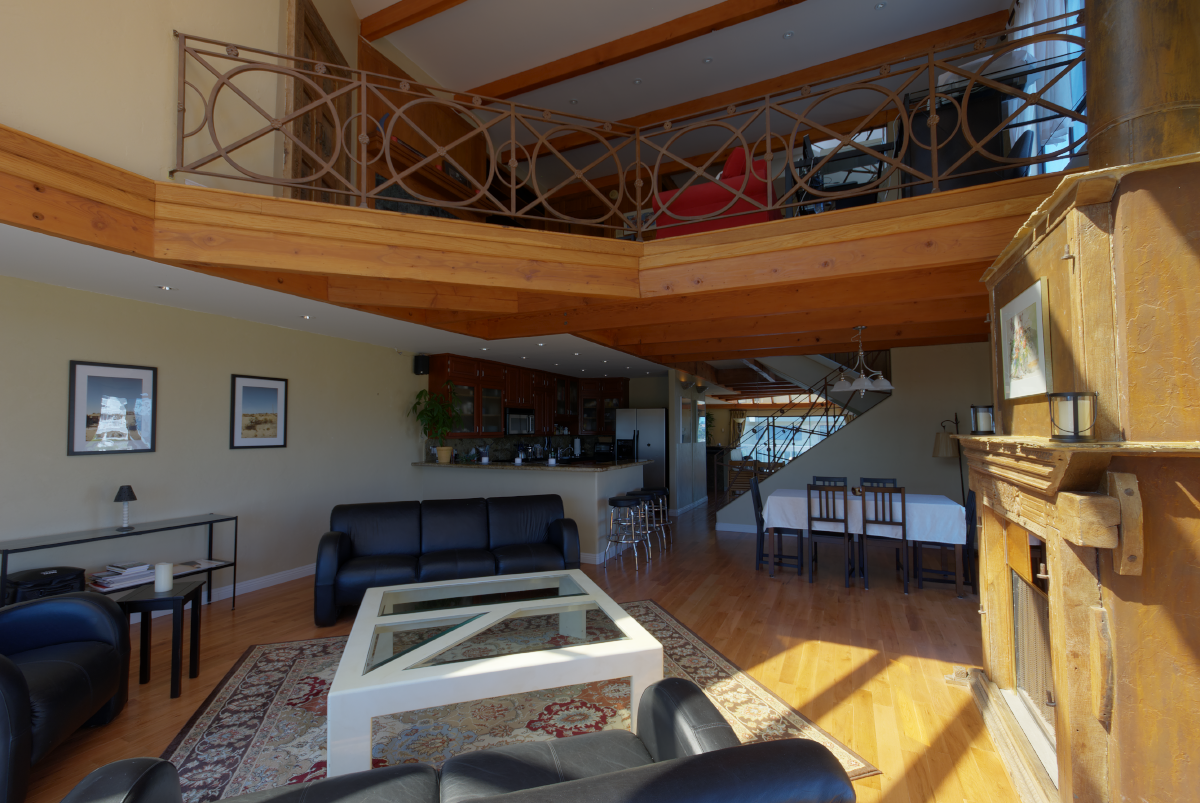
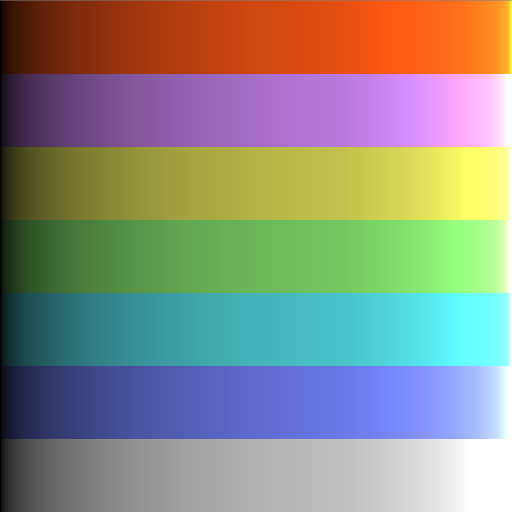
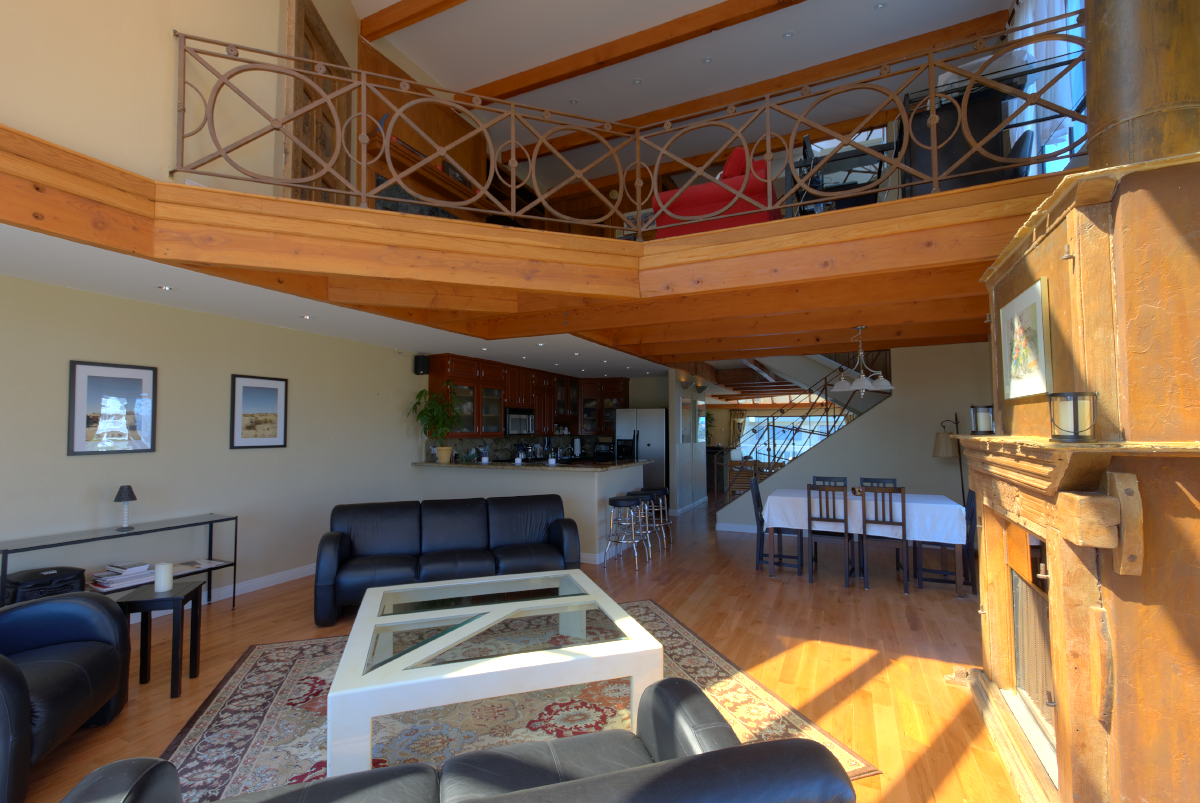
In order to explain why, I’ve pinched the HDR photo from John’s blog and it’s accompanied by some colour ramps to illustrate the results of applying various operations. The ramps go from a luminance of 0 up to a luminance of er… very large and are in linear RGB space.
Shown below are the source images (the photo is exposed at +4 stops). Click through for less tiny versions:
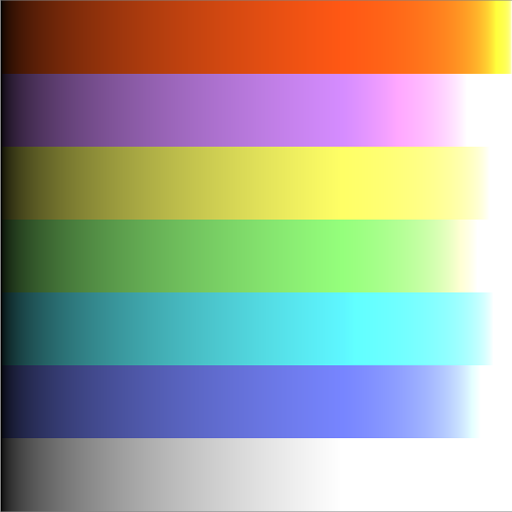
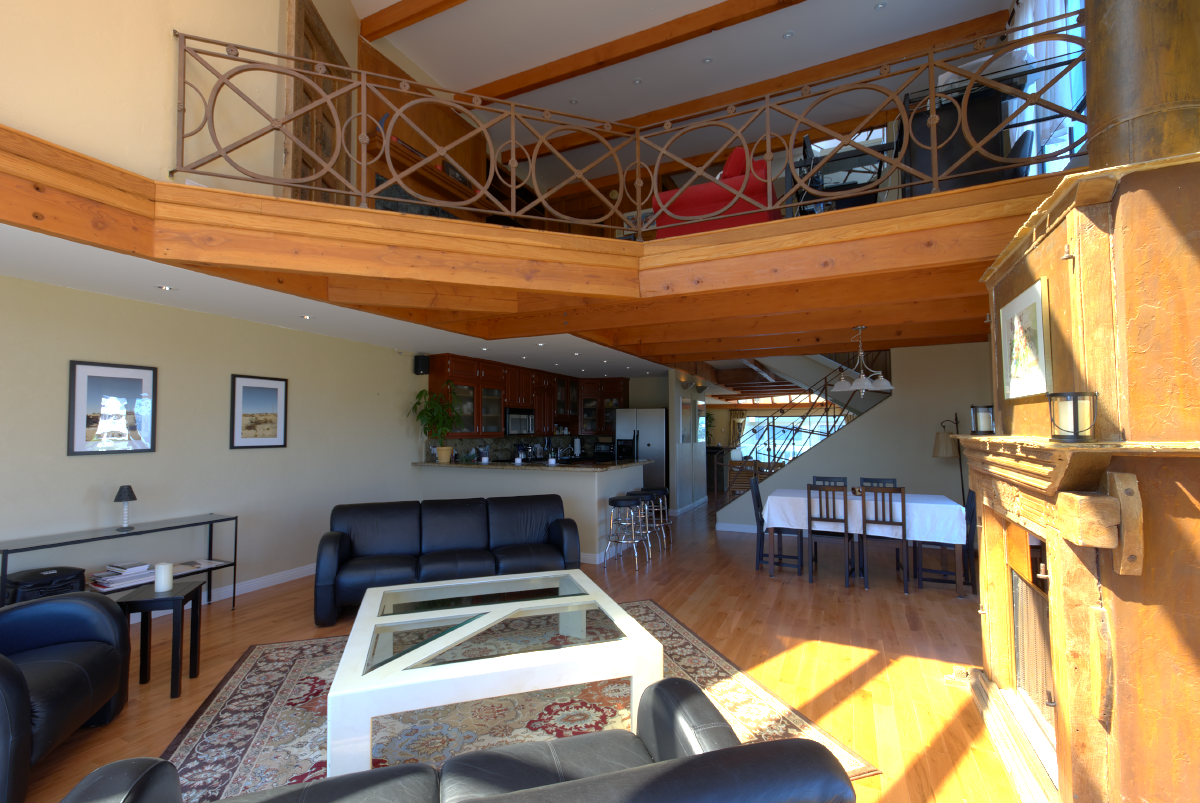
In both his blog and GDC presentation, John describes a simplified version of Reinhard’s operator as applying the following function to each colour channel:
Let’s do that to our test image and see what happens:
The top end isn’t nearly so blown out, but where did all my colour go?! That’s no good at all!
Let’s check out how John’s operator does:
It’s much better, especially in the blacks, but it’s still rather desaturated towards the top end. Perhaps that’s the price one pays for compressing the dynamic range so heavily.
Actually it doesn’t have to be.
The problem with the tone mapping operators that John describes is that they all operate on the RGB channels independently. Applying any non-linear transform in this way will result in both hue and saturation shifts, which is something that should be performed during final colour grading, not tone mapping. Instead, Reinhard’s tone mapping operator should be applied on each pixel’s luminance, which will preserve both the hue and saturation of the original image.
There’s some confusion on the internet about the correct way to apply Reinhard’s operator. Some sources recommend converting from linear RGB into CIE xyY, a colour space derived from CIE XYZ. The advantage of this colour space is that luminance is stored in the Y channel, independently of chromacity in xy. The idea is that you convert your image from RGB to xyY, perform the tone mapping on the Y channel only and then convert back to RGB.
While not complicated, the transform between linear RGB and xyY isn’t exactly trivial either. Here’s a simple implementation in C#, for a reference white of D65:
void RGBtoxyY(double R, double G, double B,
              out double x, out double y, out double Y)
{
    // Convert from RGB to XYZ
    double X = R * 0.4124 + G * 0.3576 + B * 0.1805;
    double Y = R * 0.2126 + G * 0.7152 + B * 0.0722;
    double Z = R * 0.0193 + G * 0.1192 + B * 0.9505;

    // Convert from XYZ to xyY
    double L = (X + Y + Z);
    x = X / L;
    y = Y / L;
}

void xyYtoRGB(double x, double y, double Y,
              out double R, out double G, out double B)
{
    // Convert from xyY to XYZ
    double X = x * (Y / y);
    double Z = (1 - x - y) * (Y / y);

    // Convert from XYZ to RGB
    R = X *  3.2406 + Y * -1.5372 + Z * -0.4986;
    G = X * -0.9689 + Y *  1.8758 + Z *  0.0415;
    B = X *  0.0557 + Y * -0.2040 + Z *  1.0570;
}
I was using this colour space transform for a couple of days, until my esteemed colleague Miles pointed out that I was doing it wrong. A much simpler approach is to calculate your luminance directly from the RGB values, perform the tone mapping on this value and then scale the original RGB values appropriately:
double L = 0.2126 * R + 0.7152 * G + 0.0722 * B;
double nL = ToneMap(L);
double scale = nL / L;
R *= scale;
G *= scale;
B *= scale;
This yields the same results as the conversion to and from xyY and has fewer magic numbers, which is always a win.
Now lets see what happens when we apply the same x / (x+1) to each pixel’s luminance:
Balls. This has preserved the colours, but at a terrible price; now all the whites are gone. The reason is that by preserving the hue and saturation, the operator prevents any colours being blown out to a full white. Luckily, Reinhard’s got our back. In his paper, the preceding operation is written as:
Almost immediately after this equation, Reinhard goes on to say:
“This formulation is guaranteed to bring all luminances within displayable range. However, as mentioned in the previous section, this is not always desirable”
He then presents the following:
Here, $L_{white}$ is the smallest luminance that will be mapped to 1.0.
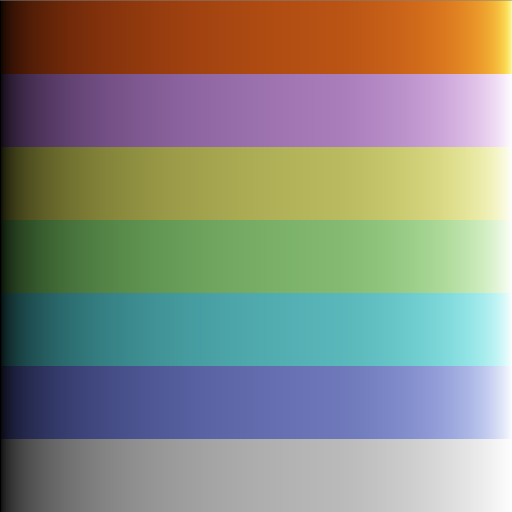
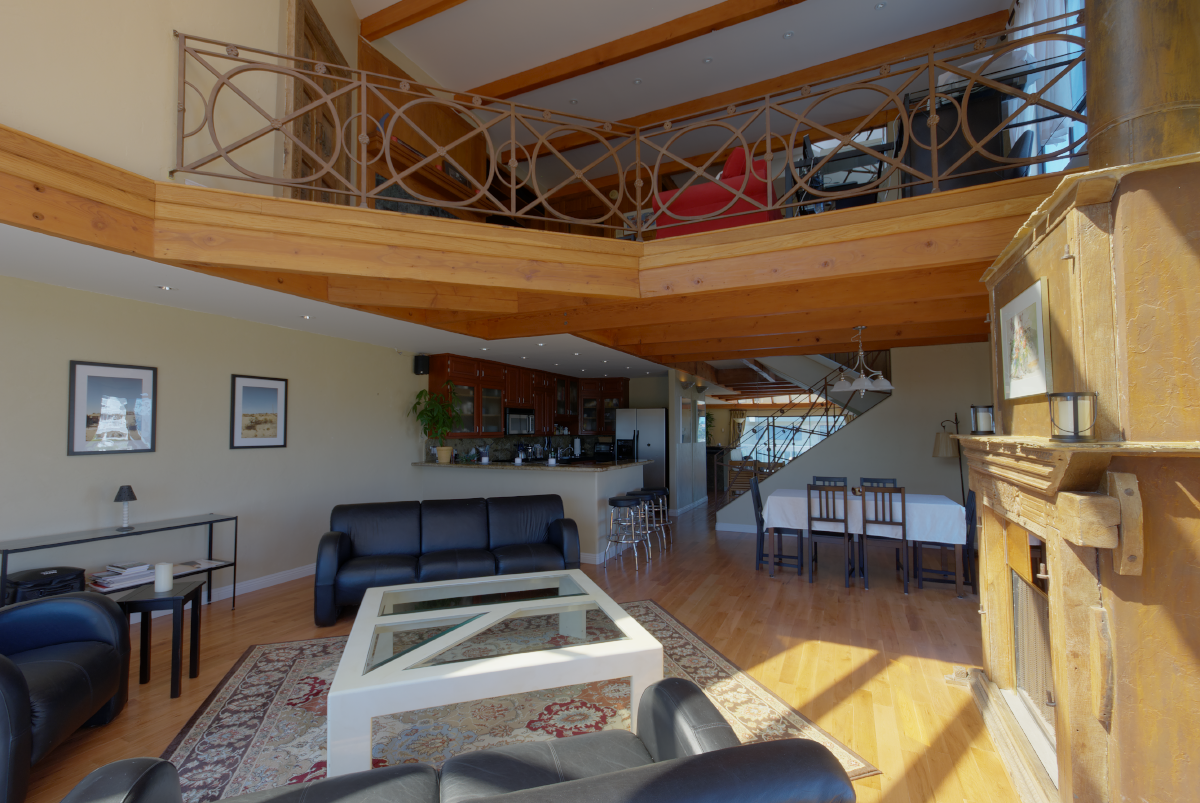
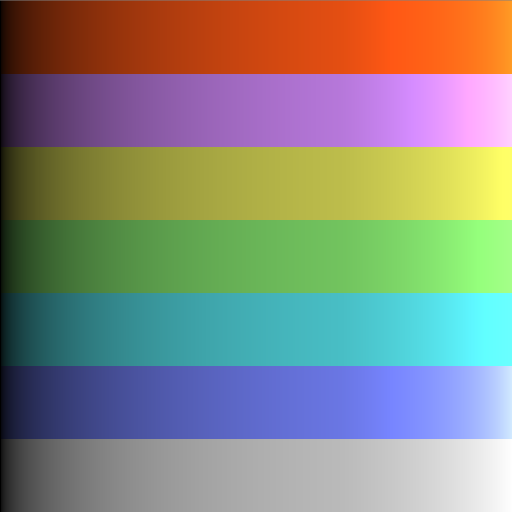
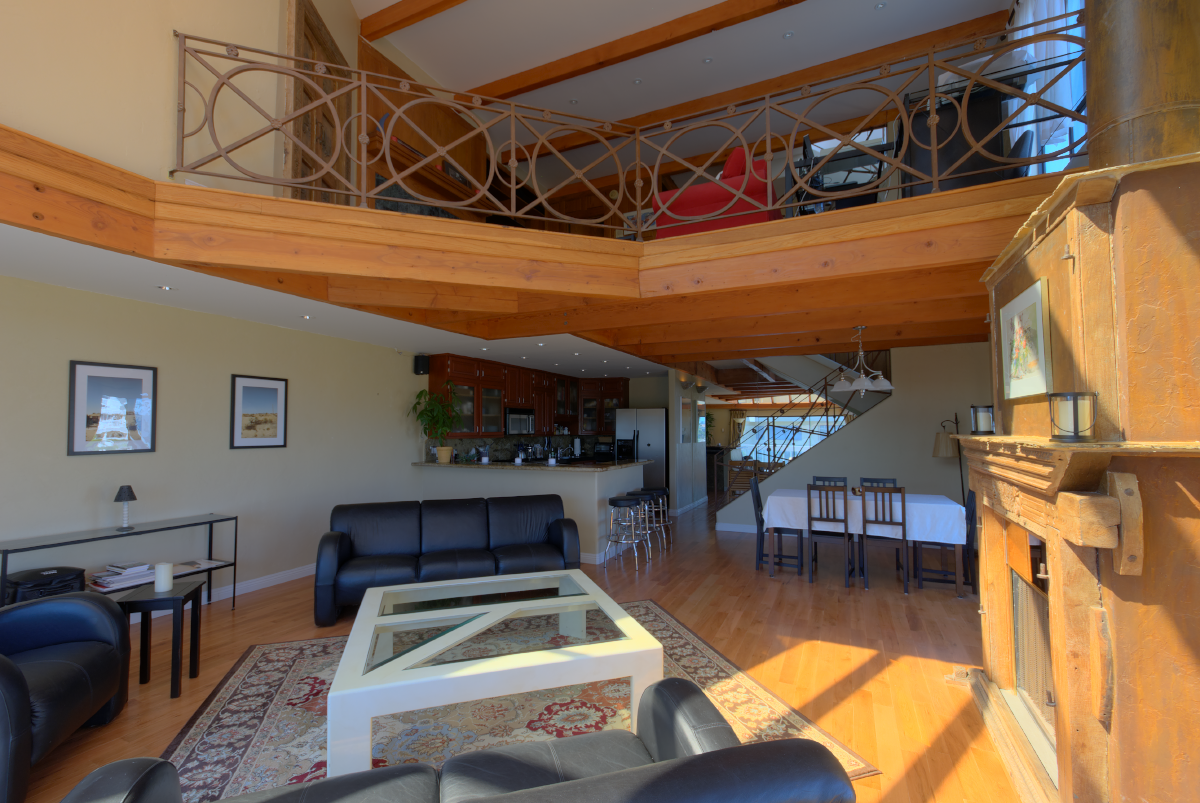
Let’s give that a whirl, with an $L_{white}$ of 4 for the colour ramps and an $L_{white}$ of 2.4 for the condo photo:
Well that’s much better than the previous effort; whether its better than John’s results is up for debate. What I like about it is that because it mostly preserves the hues, so you haven’t lost any information; if you want to crisp the blacks or desaturate the whites, you can do that in your final colour grade. If you’re colour grading via a volume texture lookup, this is for free!
Having said all that, the TFU2 environment artists were most happy with a simple brightness & contrast adjustment with a small 0 - 0.05 toe, which in the end only costs one extra madd instruction at the end of our shaders. Whatever works for your game, makes the artists happy and means you get to go home at 6pm, right?
A full implementation of Reinhard’s operator adapts to the local changes in luminance around each pixel and is a little more involved that what I’ve described here, but hopefully I’ve managed to contribute something useful to the tone mapping in games discussion and not just reduced the signal to noise ratio on the subject.